Power Pages is a fantastic platform for crafting external-facing portals, but when you integrate it with Power BI, it evolves into something even more powerful—a hub where users can interact with live data visualizations right where they’re already working.
his isn’t just about dropping a chart onto a page; it’s about embedding securely, personalizing what users see based on who’s logged in, and understanding the licensing that makes it all possible.
Let’s explore how to pull this off, from embedding methods to security trade-offs, dynamic filtering, and the costs you’ll need to consider.
Embedding Power BI: Publish to Web vs. Secure Options
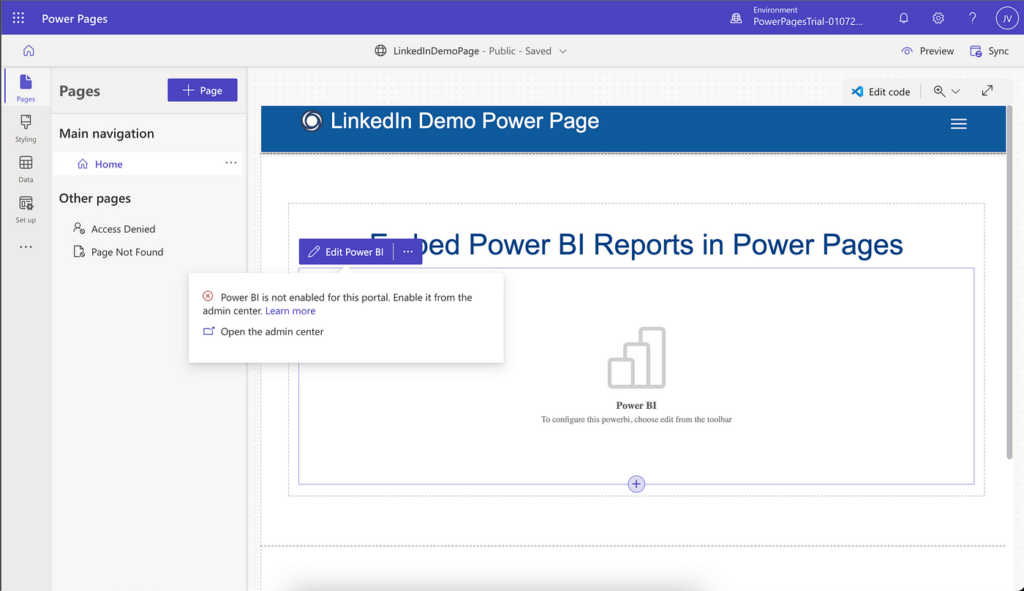
Embedding Power BI content into Power Pages starts with two main options: the quick “Publish to Web” method or the more controlled secure embedding route.
“Publish to Web” is the fast track—open your report in Power BI, go to File > Publish to Web, and grab the embed code it spits out. You can paste that straight into a Power Pages Web Template or a custom HTML section, like this:
<iframe width="800" height="600" src="https://app.powerbi.com/view?r=yourpubliclinkhere" frameborder="0" allowfullscreen></iframe>It’s live in minutes, no fuss. The downside? It’s public—anyone with the link can see it, no authentication required.
That’s perfect for generic, non-sensitive data like public stats or marketing trends, but if you’re showing customer-specific revenue or internal metrics, it’s a non-starter. Security isn’t an option here; it’s wide open by design.
For sensitive data, secure embedding is the way to go. This keeps your Power BI content behind a login, tied to the portal’s authentication.
Start by publishing your report to a Power BI workspace in your tenant. Then, use the Power BI embedding feature for authenticated users.
You’ll need to set up an Azure AD app registration with permissions like “Report.Read.All,” generate an embed token via the Power BI REST API, and embed it with JavaScript. Here’s a basic example you’d add to a Web Template:
const embedConfig = {
  type: 'report',
  id: 'your-report-id',
  embedUrl: 'https://app.powerbi.com/reportEmbed',
  accessToken: 'your-embed-token',
  tokenType: models.TokenType.Embed
};
const reportContainer = document.getElementById('reportContainer');
powerbi.embed(reportContainer, embedConfig);
Pair this with a <div id=”reportContainer”></div> in your HTML, and you’ve got a secure report visible only to authenticated portal users. It’s more work than Publish to Web, but it keeps your data safe.
Filtering Reports Dynamically for Logged-In Users
Static reports are fine, but the real value comes from personalizing what users see based on who they are.
Power Pages knows who’s logged in via its Dataverse-backed authentication, and you can pass that info to Power BI to filter reports dynamically. Say a customer logs in—you want them to see only their own sales data, not everyone’s.
In Power BI, set up Row-Level Security (RLS) on your dataset. Define roles—like “Customer”—and add a filter, such as [CustomerID] = USERPRINCIPALNAME(), which ties the data to the logged-in user’s email or ID.
Assign portal users to these roles in the Power BI service. When embedding, pass the user’s identity to the report using the embed token. Update the JavaScript like this:
const embedConfig = {
  type: 'report',
  id: 'your-report-id',
  embedUrl: 'https://app.powerbi.com/reportEmbed',
  accessToken: 'your-embed-token',
  tokenType: models.TokenType.Embed,
  settings: {
    filterPaneEnabled: false
  },
  identity: {
    username: 'loggedinuser@yourdomain.com', // Pulled from Power Pages user data
    roles: ['Customer']
  }
};
powerbi.embed(reportContainer, embedConfig);
In Power Pages, grab the logged-in user’s details (like their contact ID or email) via Liquid or a FetchXML query, then feed it into the embed code. Now, each user sees a report tailored just for them—secure and relevant.
Security Considerations in Embedding
Security is the backbone of this integration. “Publish to Web” is a no-go for anything confidential—it’s like leaving your front door unlocked. Secure embedding, on the other hand, leverages Azure AD and Power Pages’ authentication, ensuring only authorized users get access. But it’s not foolproof—you need to manage who has portal access and align that with Power BI permissions.
Test your setup in a development environment first; expose it to a few dummy users and check that RLS works as expected. Also, keep embed tokens short-lived (they expire after an hour by default) and refresh them via API calls to avoid interruptions. It’s a balance of usability and protection.
Licensing Implications to Watch For
None of this comes free, and licensing can trip you up if you’re not careful. “Publish to Web” is included with any Power BI license—even the free tier—since it’s public anyway. Secure embedding, though, requires more.
Your portal users need a Power Pages license (per user or capacity-based), and to view embedded Power BI content, they’ll typically need a Power BI Pro license (about $20/user/month) unless the data’s in a Premium capacity workspace.
Premium Per User ($20/user/month) or Premium Capacity (starting at $5,000/month) lets you share with unlicensed users, but that’s a big jump for smaller setups.
Check your user count and budget—Pro licenses might suffice for a handful of users, while Premium makes sense for broader audiences. Either way, factor this into your planning.
Hope this helped!