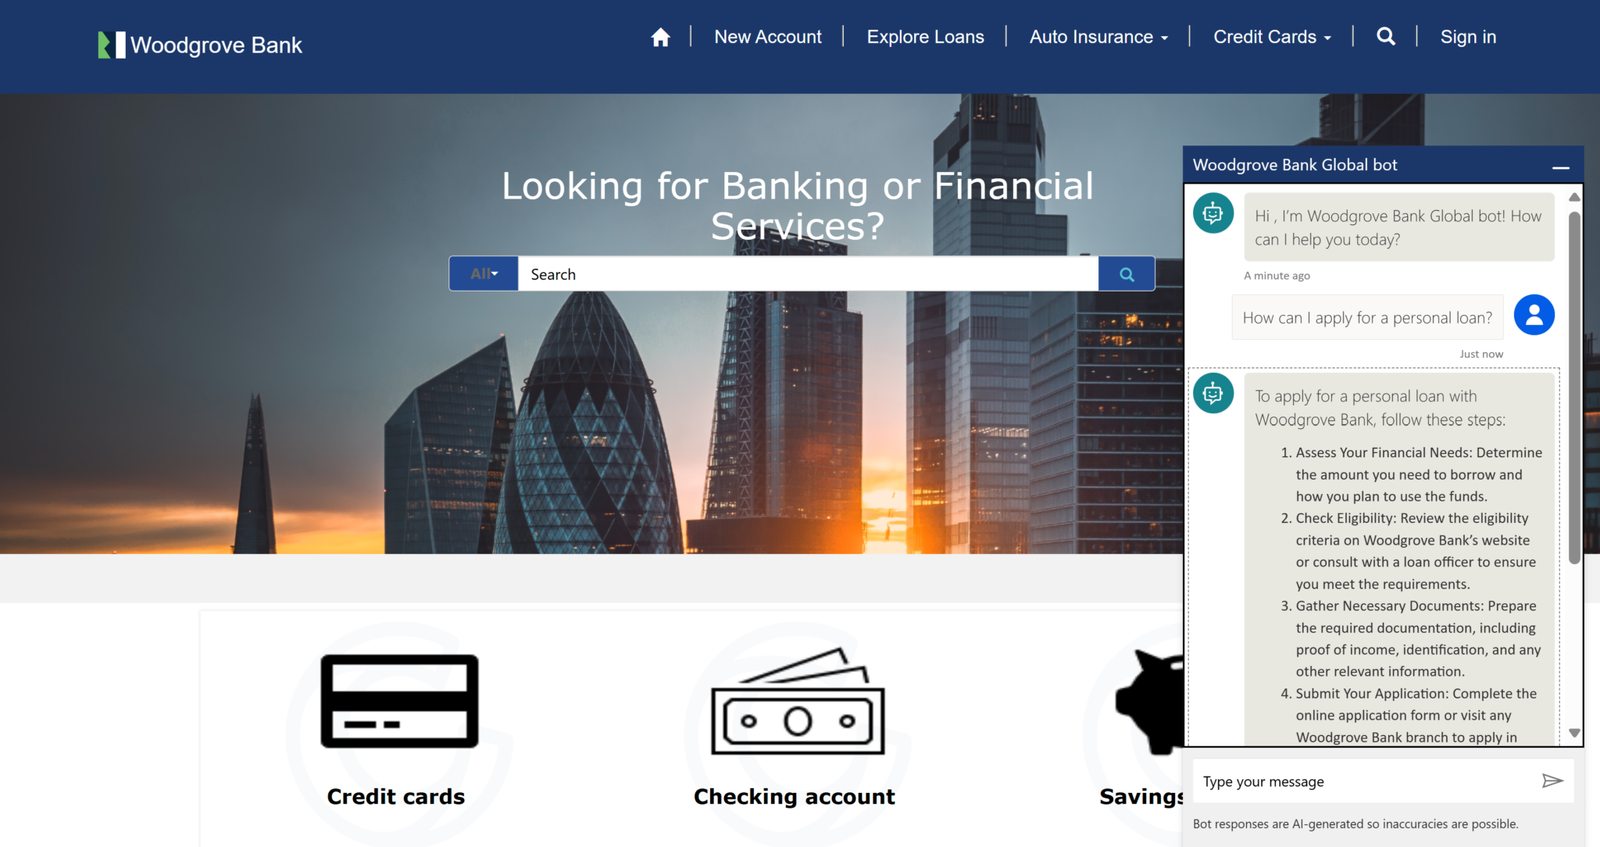
Power Pages is a fantastic platform for building user-friendly, external-facing websites, but its real magic shines when you pair it with Power Automate.
By integrating these two tools, you can turn a static portal into a dynamic hub that automates tasks, connects systems, and streamlines processes—all without breaking a sweat.
Whether it’s sending an email notification when someone submits a form, creating records in Dataverse based on user input, or kicking off an approval process right from the portal, Power Automate cloud flows bring a whole new level of efficiency to Power Pages.
Let me show you how this works!
The Power of Power Automate and Power Pages Together
Power Pages already makes it easy to create portals for customers, partners, or employees, but it’s not just about displaying data or collecting input—it’s about what happens next. That’s where Power Automate steps in.
As part of the Microsoft Power Platform, Power Automate lets you build cloud flows that respond to events in your portal, connecting them to hundreds of services or custom logic.
The beauty of this integration is how seamlessly it fits into the low-code ethos of the platform. You don’t need to be a developer to set it up, but it’s robust enough to handle complex business needs.
Think of it as the glue that ties your portal’s front-end experience to back-end actions, making workflows feel effortless for both you and your users.
Triggering Cloud Flows from Power Pages
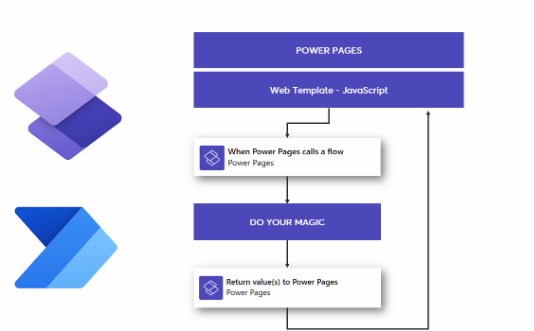
The starting point for this integration is figuring out how to trigger a Power Automate flow from something happening in Power Pages. The most common way to do this is through form submissions, since forms are a core part of most portals—whether it’s a contact request, a support ticket, or a registration page. Power Pages lets you attach a cloud flow directly to a form’s submission event, so when a user hits “Submit,” the flow kicks off automatically.
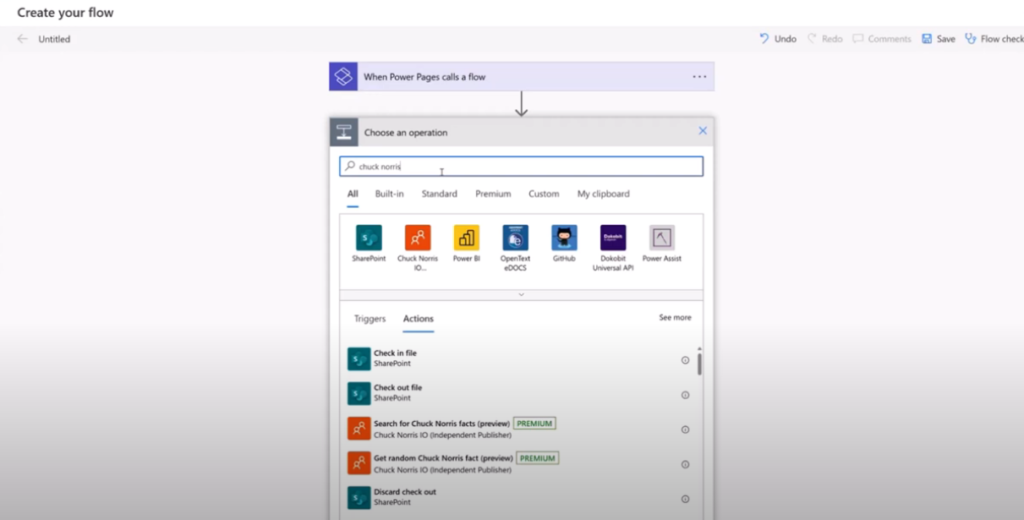
To set this up, you design your form in Power Pages, link it to a Dataverse table if it’s storing data, and then head to Power Automate to create a flow. The trigger you’ll use is “When a record is created” (or updated, depending on your scenario) in Dataverse, since form submissions typically create or modify records there. From that trigger, you build out the steps—whether it’s sending an email, updating another system, or starting an approval process. Back in Power Pages, you configure the form to call that flow, and you’re off to the races. It’s a straightforward handshake between the two tools that opens up endless possibilities.
Example 1: Sending Email Notifications on Form Submission
Let’s start with a classic use case: sending an email notification when someone submits a form. Imagine you’ve got a “Contact Us” page on your Power Pages portal. A visitor fills out their name, email, and message, and submits it. You want your support team to get an instant heads-up.
In Power Pages, you set up the form and tie it to a Dataverse table like “Contacts” or a custom table for inquiries. Then, in Power Automate, you create a new cloud flow with the “When a record is created” trigger, pointing to that table.
Add an action like “Send an email” (using Outlook or another connector), and pull in the form data—say, the submitter’s name and message—into the email body. Save the flow, link it to your form in Power Pages, and test it out.
The moment someone submits the form, your team gets an email with all the details. It’s simple, but it cuts out manual steps and keeps everyone in the loop without delay.
Example 2: Creating Dataverse Records from Portal Input
Now, let’s take it up a notch. Suppose your portal lets users request a service—like booking a consultation. You want that request to not only save in Dataverse but also create a related record, like a task for your team to follow up. This is where Power Automate’s ability to manipulate data shines.
Build your request form in Power Pages and map it to a “Service Requests” table in Dataverse. In Power Automate, start with the same “When a record is created” trigger for that table.
Next, add a “Create a new record” action for a table like “Tasks.” You can populate the task’s fields with data from the form—set the subject to “Follow up on [Request ID],” assign it to a team member, and link it back to the original request using the record’s ID.
When a user submits the form, the request saves in Dataverse, and a task pops up for your team—all automated. It’s a clean way to turn user input into actionable steps without anyone lifting a finger.
Example 3: Running Approval Processes from the Portal
Sometimes, portal actions need a green light before moving forward—like approving a submitted application or a budget request.
Power Automate’s approval capabilities make this a breeze. Let’s say your Power Pages site has a form for employees to request new equipment. You want a manager to approve it before it’s processed.
Set up the form in Power Pages, tied to a Dataverse table like “Equipment Requests.” In Power Automate, use the “When a record is created” trigger for that table.
Add an “Start and wait for an approval” action, configuring it to send an approval request to the employee’s manager (you can pull the manager’s email from a related “Users” table in Dataverse).
Include details from the form—like the equipment type and cost—in the approval message. If the manager approves, the flow can create a purchase order record or notify procurement; if they reject it, it can email the employee with feedback.
Hook this flow to your form, and you’ve got an approval process that runs itself, all triggered from the portal. It’s a game-changer for keeping things moving without constant back-and-forth.
if you have any questions, hit me up on linkedin!